How to Transcribe a Zoom Meeting Recording
With TranscribeKit you can transcribe any Zoom recording in one of our 59 supported languages and only pay for what you transcribe. Follow these steps to create a text transcript of your meeting.
1. Record your Zoom meeting
Start your meeting and click on the Record button at the bottom. If a menu pops up then choose Record on this Computer. After you end the meeting a folder containing the audio and video files will pop up.
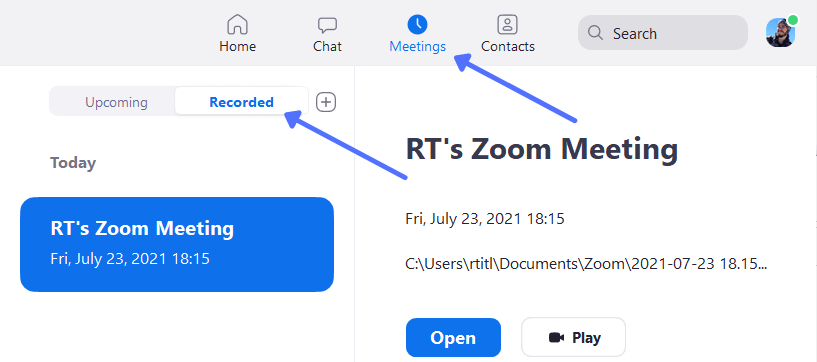
If you need to come back to an existing recording later then in Zoom you can click on Meetings and then Recorded. Click your meeting in the list and then click Open to open the folder containing the files.
If you have any issues then click here for Zoom's full recording guide
2. Upload the audio file to Google Drive
You should now have a folder containing the meeting recording. There should be at least one file named audio_only which is what you need to transcribe. There could be multiple files if you stopped and started the recording during the meeting so double-click the file to play it and check its contents. There should also be a video file named zoom_0. You could transcribe this instead but it will take longer to upload since video files are larger.
Now that you have the audio file you can click here to open Google Drive in a new tab. If you don't already have a Google account then you can create one for free.
The easiest way to upload is to drag and drop the audio_only file onto your Drive (see image below).
If that doesn't work for some reason then click New and then File upload. Now select your Documents folder, inside it should be a Zoom folder and inside that you can find your recorded meetings.
If you have any issues then click here for Google's full guide to Google Drive
3. Request a transcription
Once your recording is uploaded to Google Drive you can transcribe it using the TranscribeKit add-on. Click here for the full step-by-step guide

